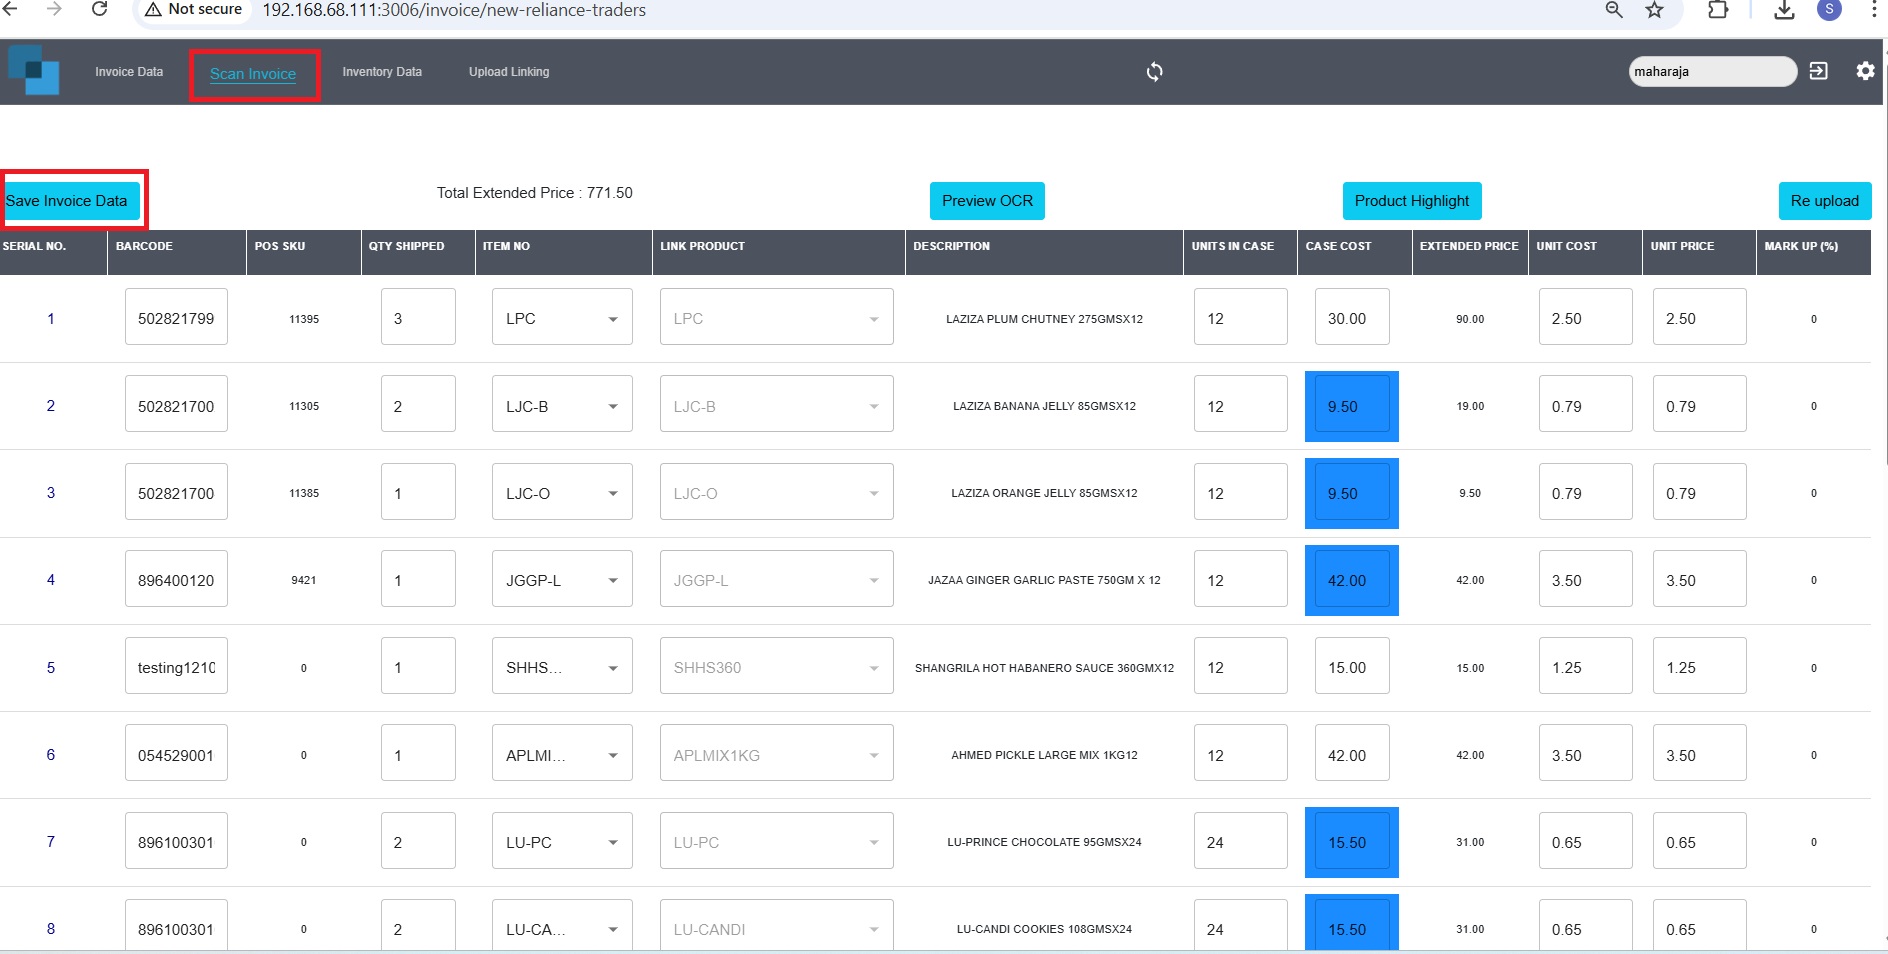
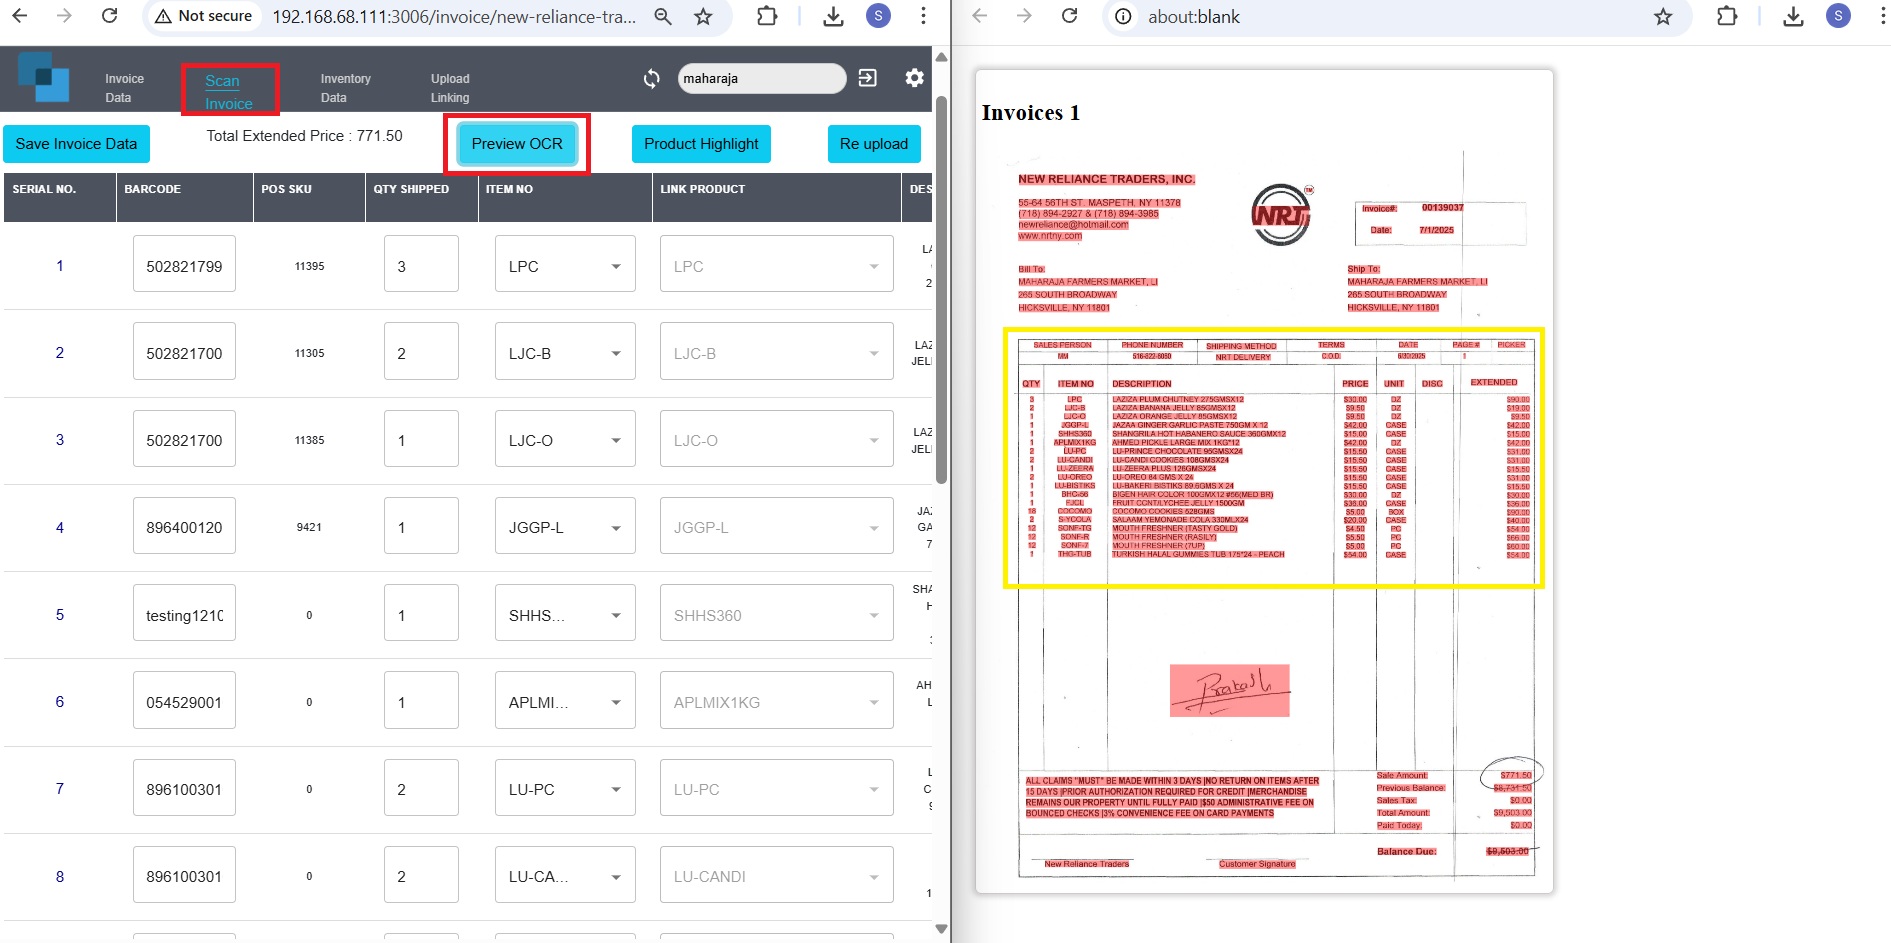
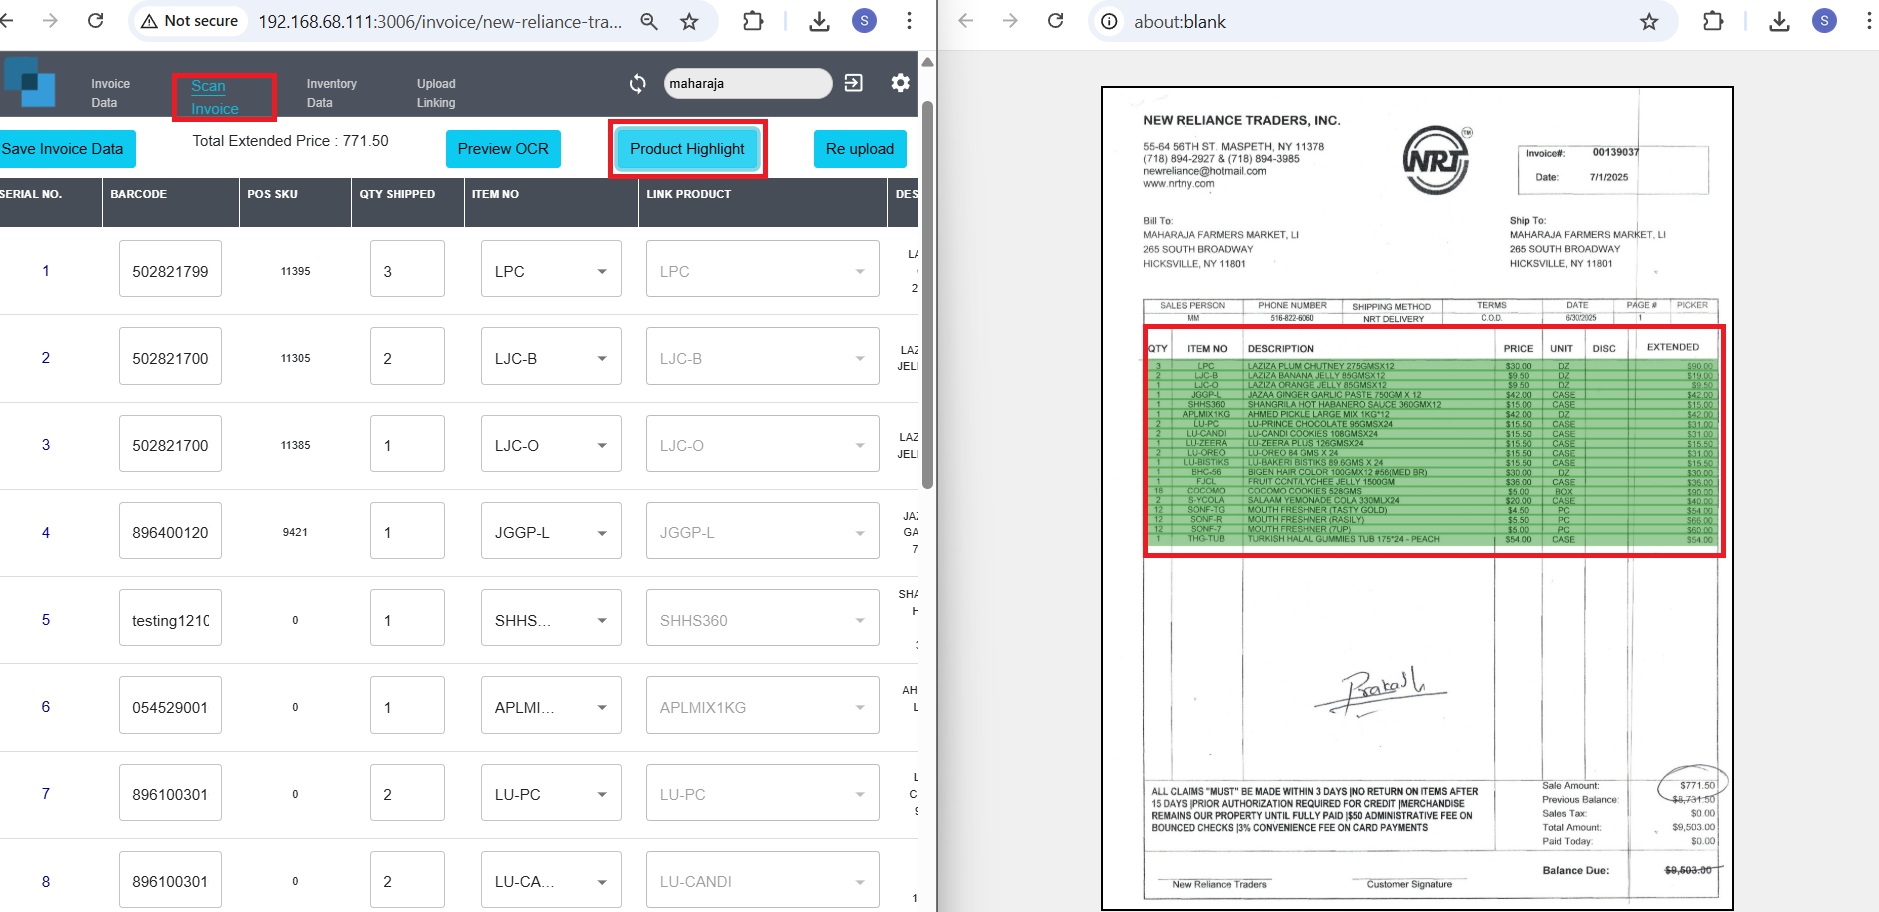
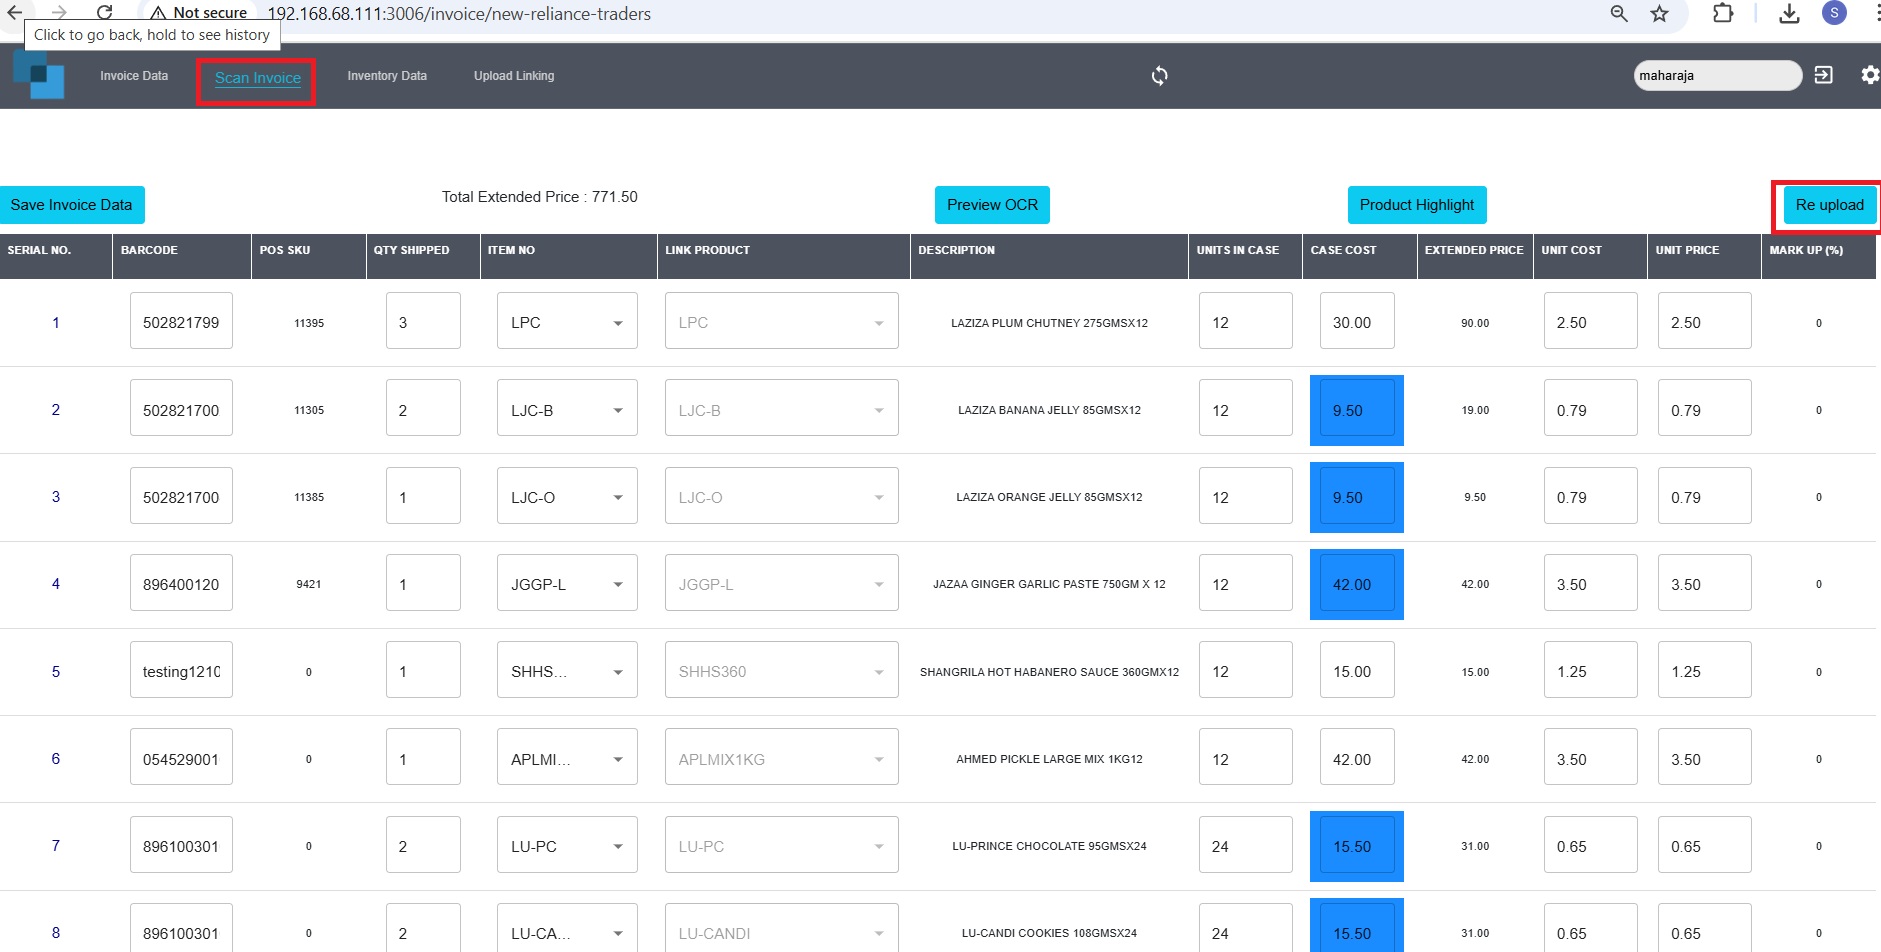
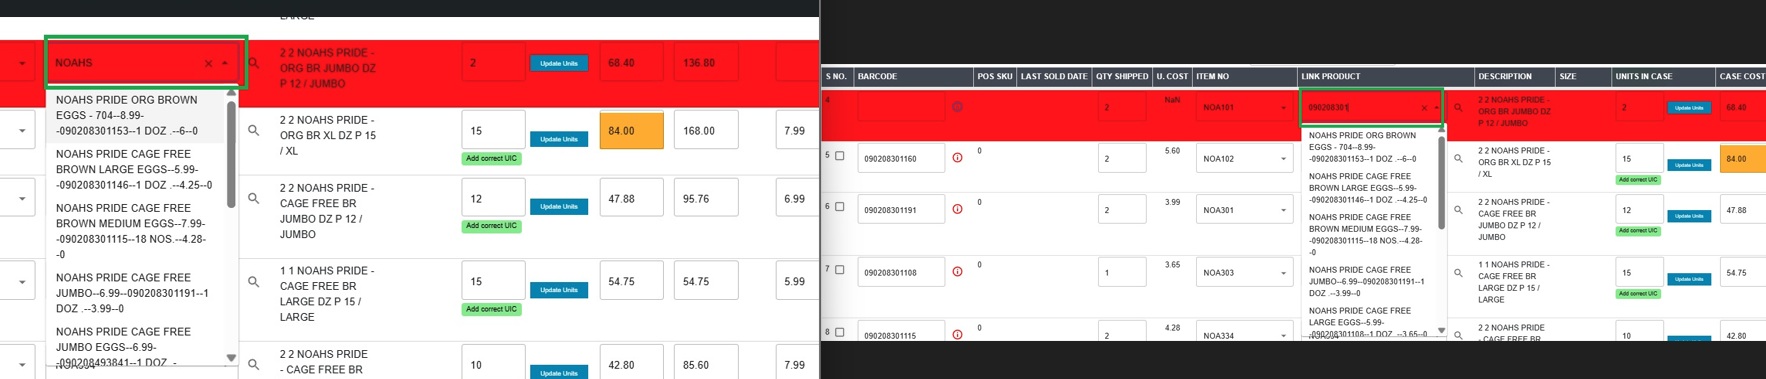
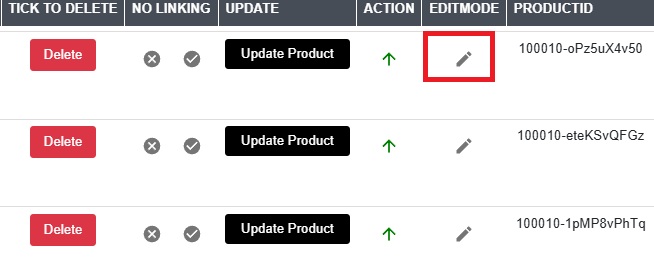
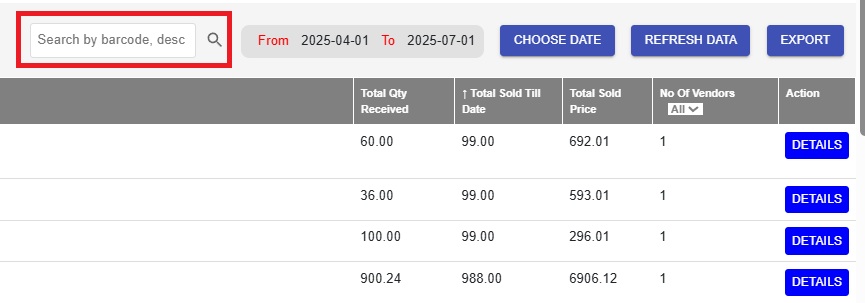
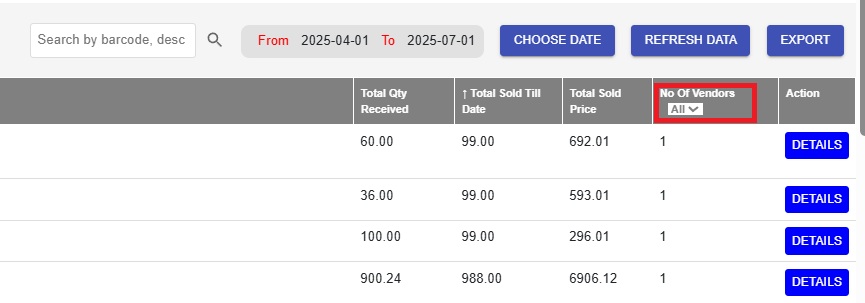
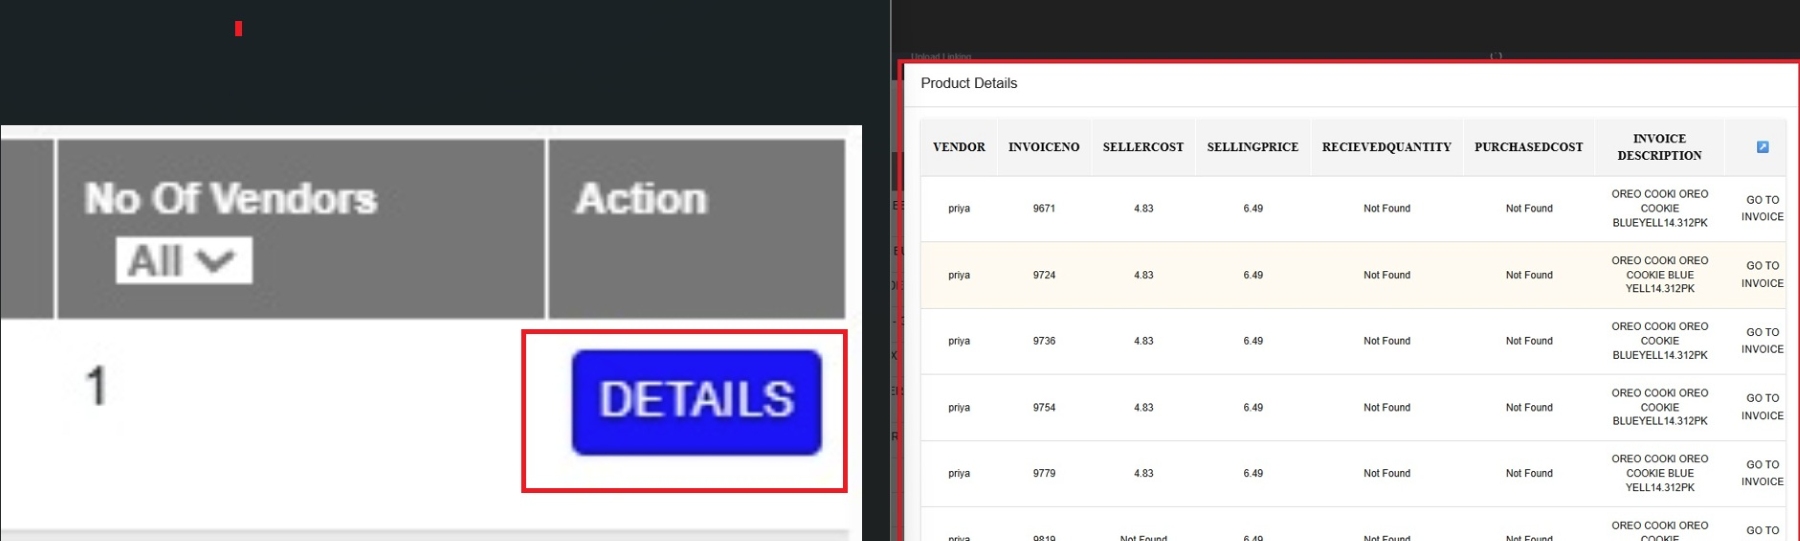
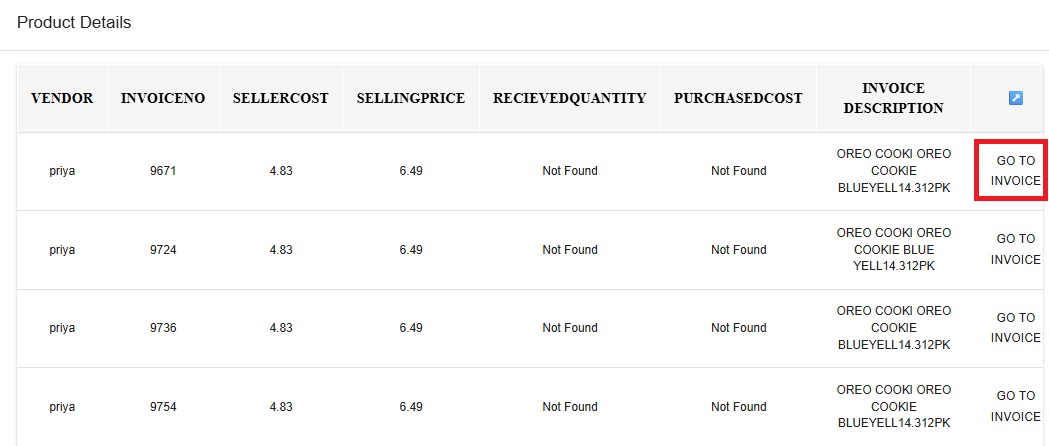
Click the Edit Mode button to modify an existing product’s Item No. and Description or to enter a new product’s details.
1. Open Edit Mode
Click the Edit Mode button.
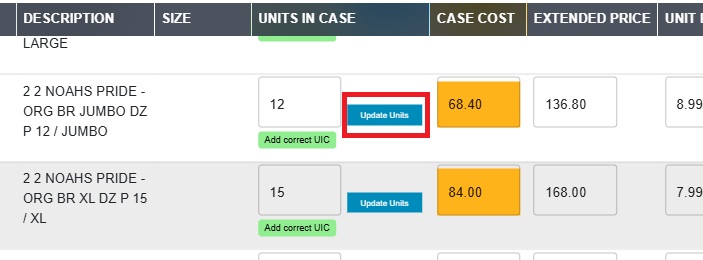
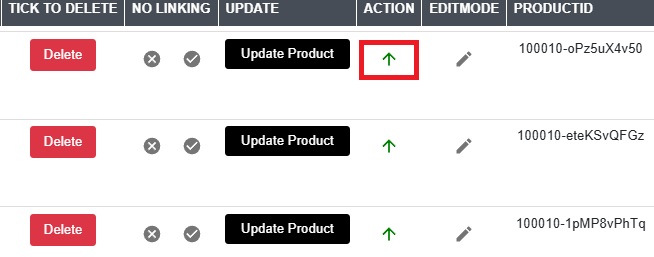
2. Fill or Modify Fields
Update the Description, Item No., Quantity, Unit in Case, etc.
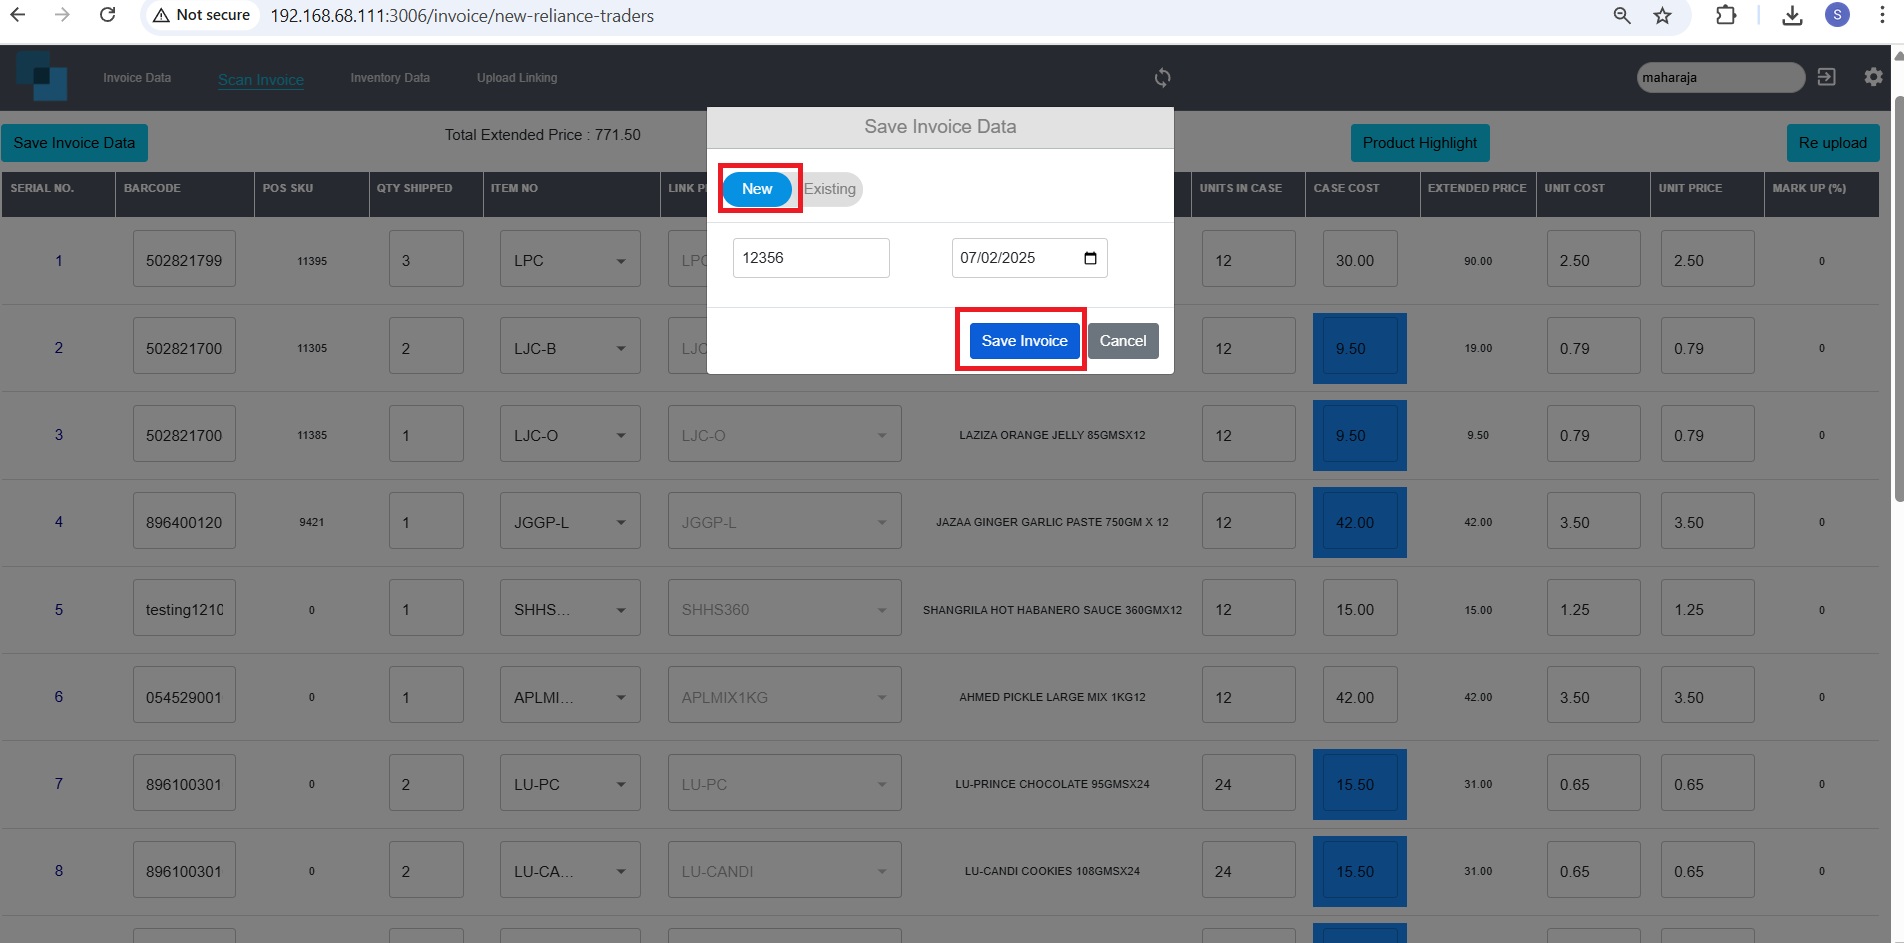
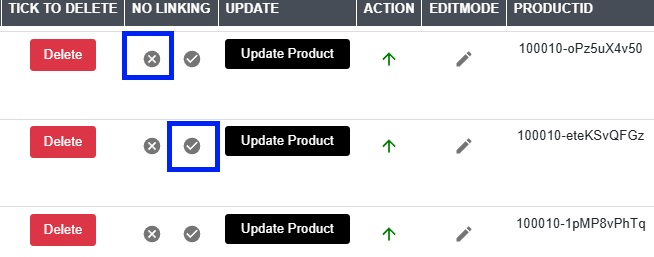
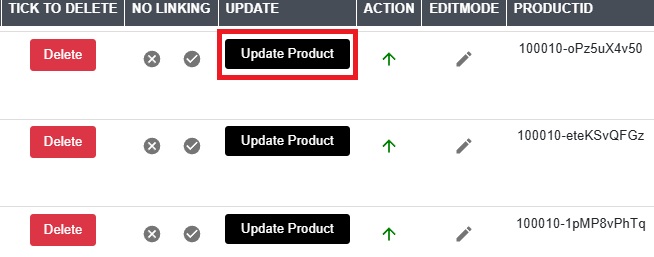
3. Save Changes
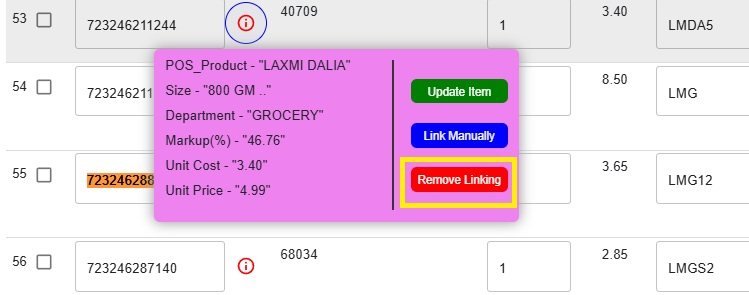
Existing products: With Edit Mode still open, click the Update Product button (black) to save your edits.
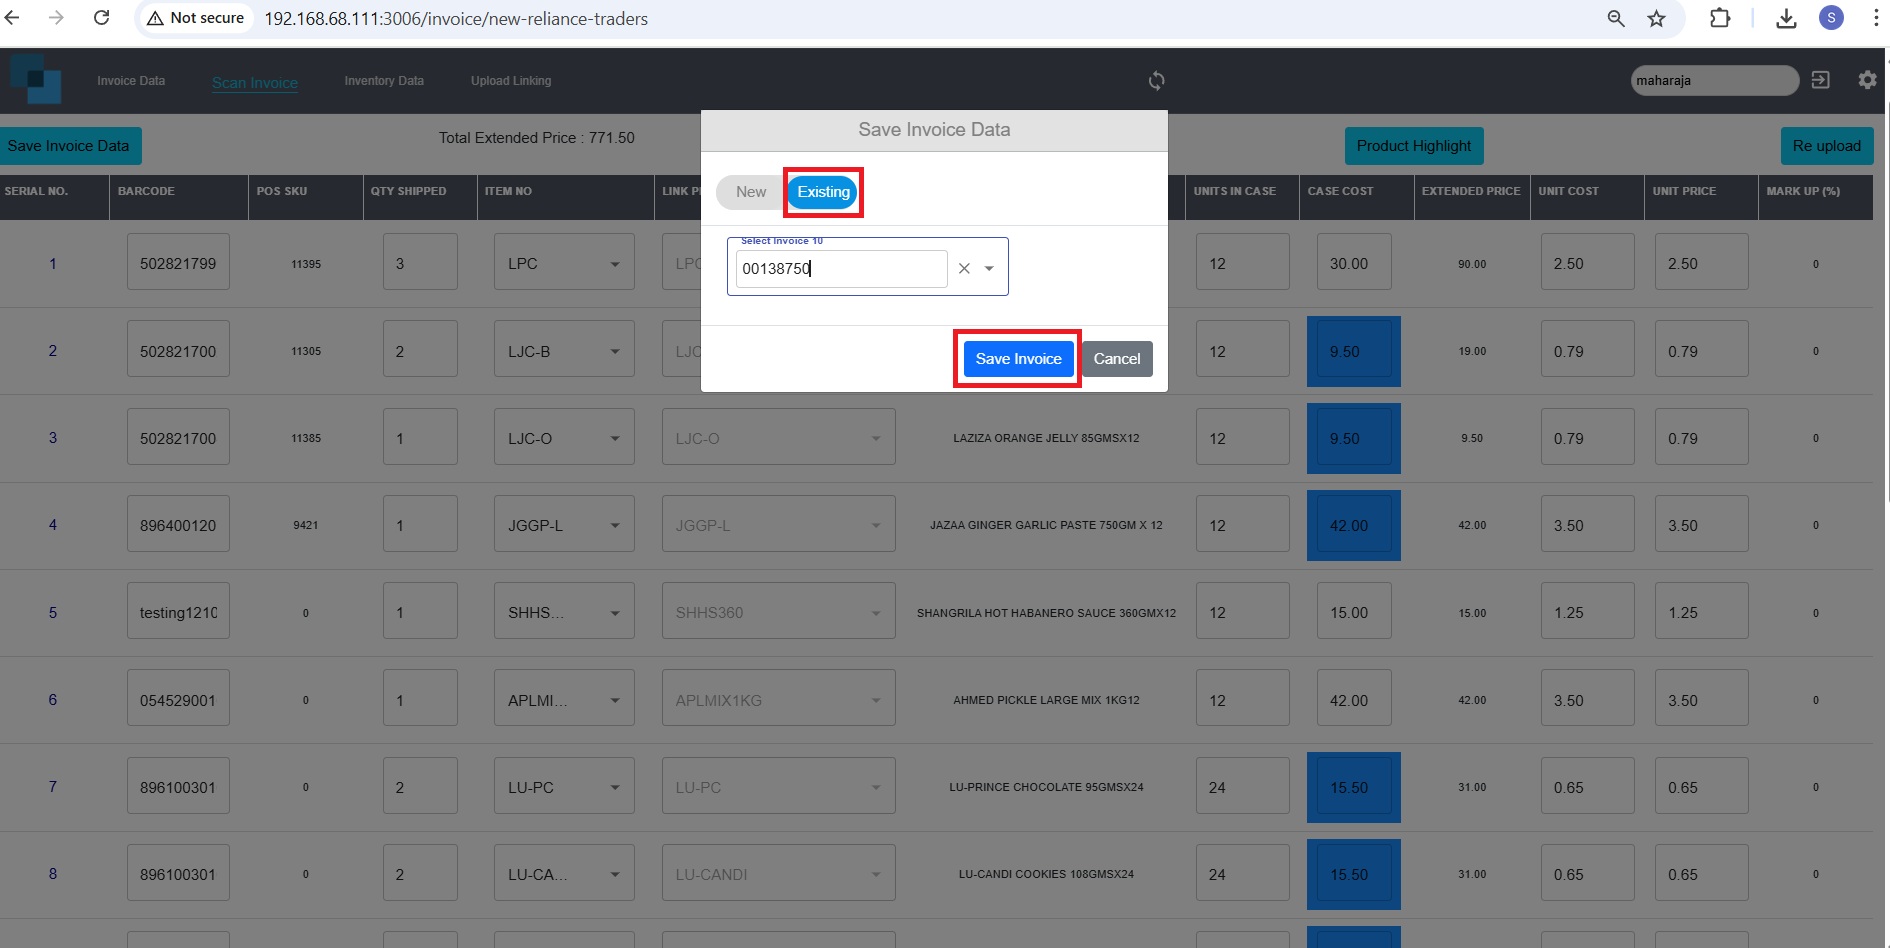
New products: After filling in all fields, close Edit Mode and click the Update Item button (the “i” icon on hover) to add the product.